Chapter 25Laboratory identity
Menu: Laboratory identity. Address: /setup/identity.
25.1 What this screen is for
This is where the laboratory says who it is: its name, how to reach it, its two colours and its logo. The name, contacts and logo as they appear on the laboratory's public page. The colours also reach the printed report's rules and section titles, the results page a patient opens, and the results emails, as the hints beside the two colour fields say.
You change the fields, see the colours in a live preview, and save everything together with Save. Nothing is written until you save.
25.2 Who sees it
Whoever holds Manage settings. The menu hides the screen from everyone else.
| You can… | …if your role holds |
|---|---|
| Open the screen, change the identity and save it | Manage settings |
25.3 The screen at a glance
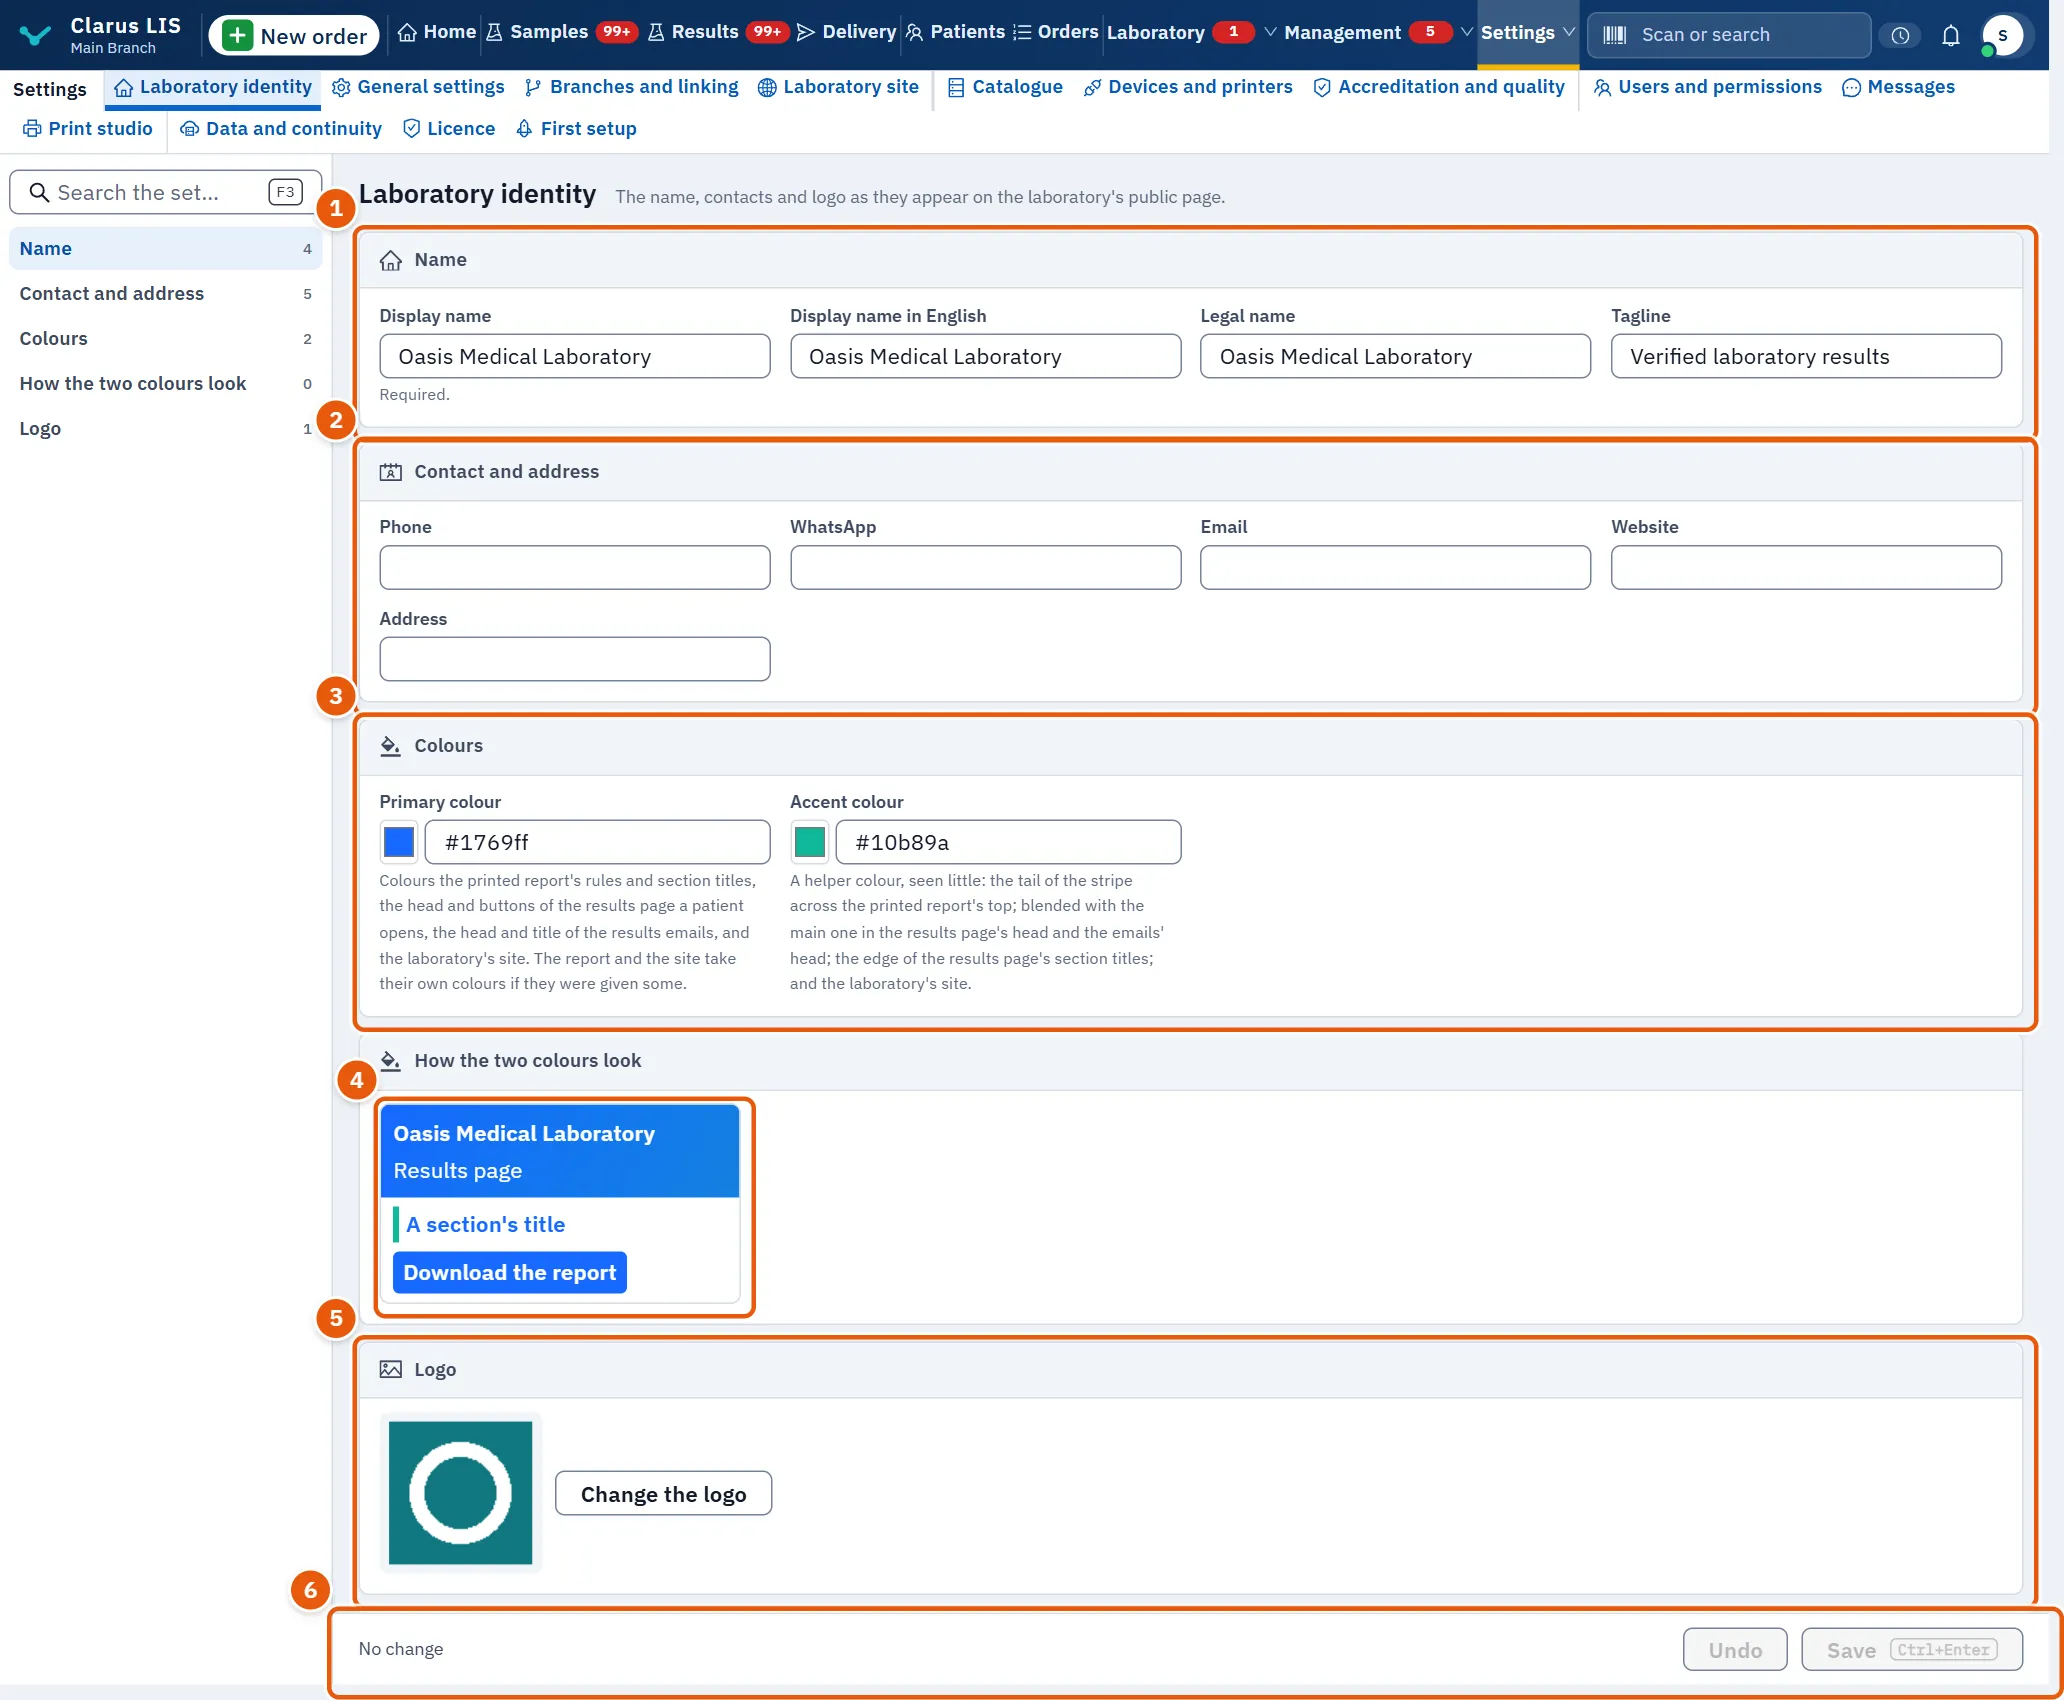
The screen has these parts:
- Name: the laboratory's names and tagline.
- Contact and address: phone, WhatsApp, email, website and address.
- Colours: the primary and accent colours.
- How the two colours look: the two colours as they will look.
- Logo: the picture and the button to change it.
- The save bar: the list of fields you have changed, Undo and Save.
25.4 Every area and its items
25.4.1 Name
| Item | What it does |
|---|---|
| Display name | The laboratory's name as shown. |
| Display name in English | The same name in English. |
| Legal name | The laboratory's legal name. |
| Tagline | A short line that describes the laboratory. |
25.4.2 Contact and address
| Item | What it does |
|---|---|
| Phone | The laboratory's phone number. |
| The laboratory's WhatsApp number. | |
| The laboratory's email address. | |
| Website | The laboratory's website. |
| Address | The laboratory's address. |
The phone, WhatsApp, email and website fields are written left to right. The screen does not stop you typing other letters in them.
25.4.3 Colours
| Item | What it does |
|---|---|
| Primary colour | The main colour. It colours the printed report's rules and section titles, the head and buttons of the results page a patient opens, the head and title of the results emails, and the laboratory's site. The report and the site take their own colours if they were given some. |
| Accent colour | A helper colour, seen little: the tail of the stripe across the top of the printed report, the edge of the results page's section titles, a blend with the main colour in the page head and the emails' head, and the laboratory's site. |
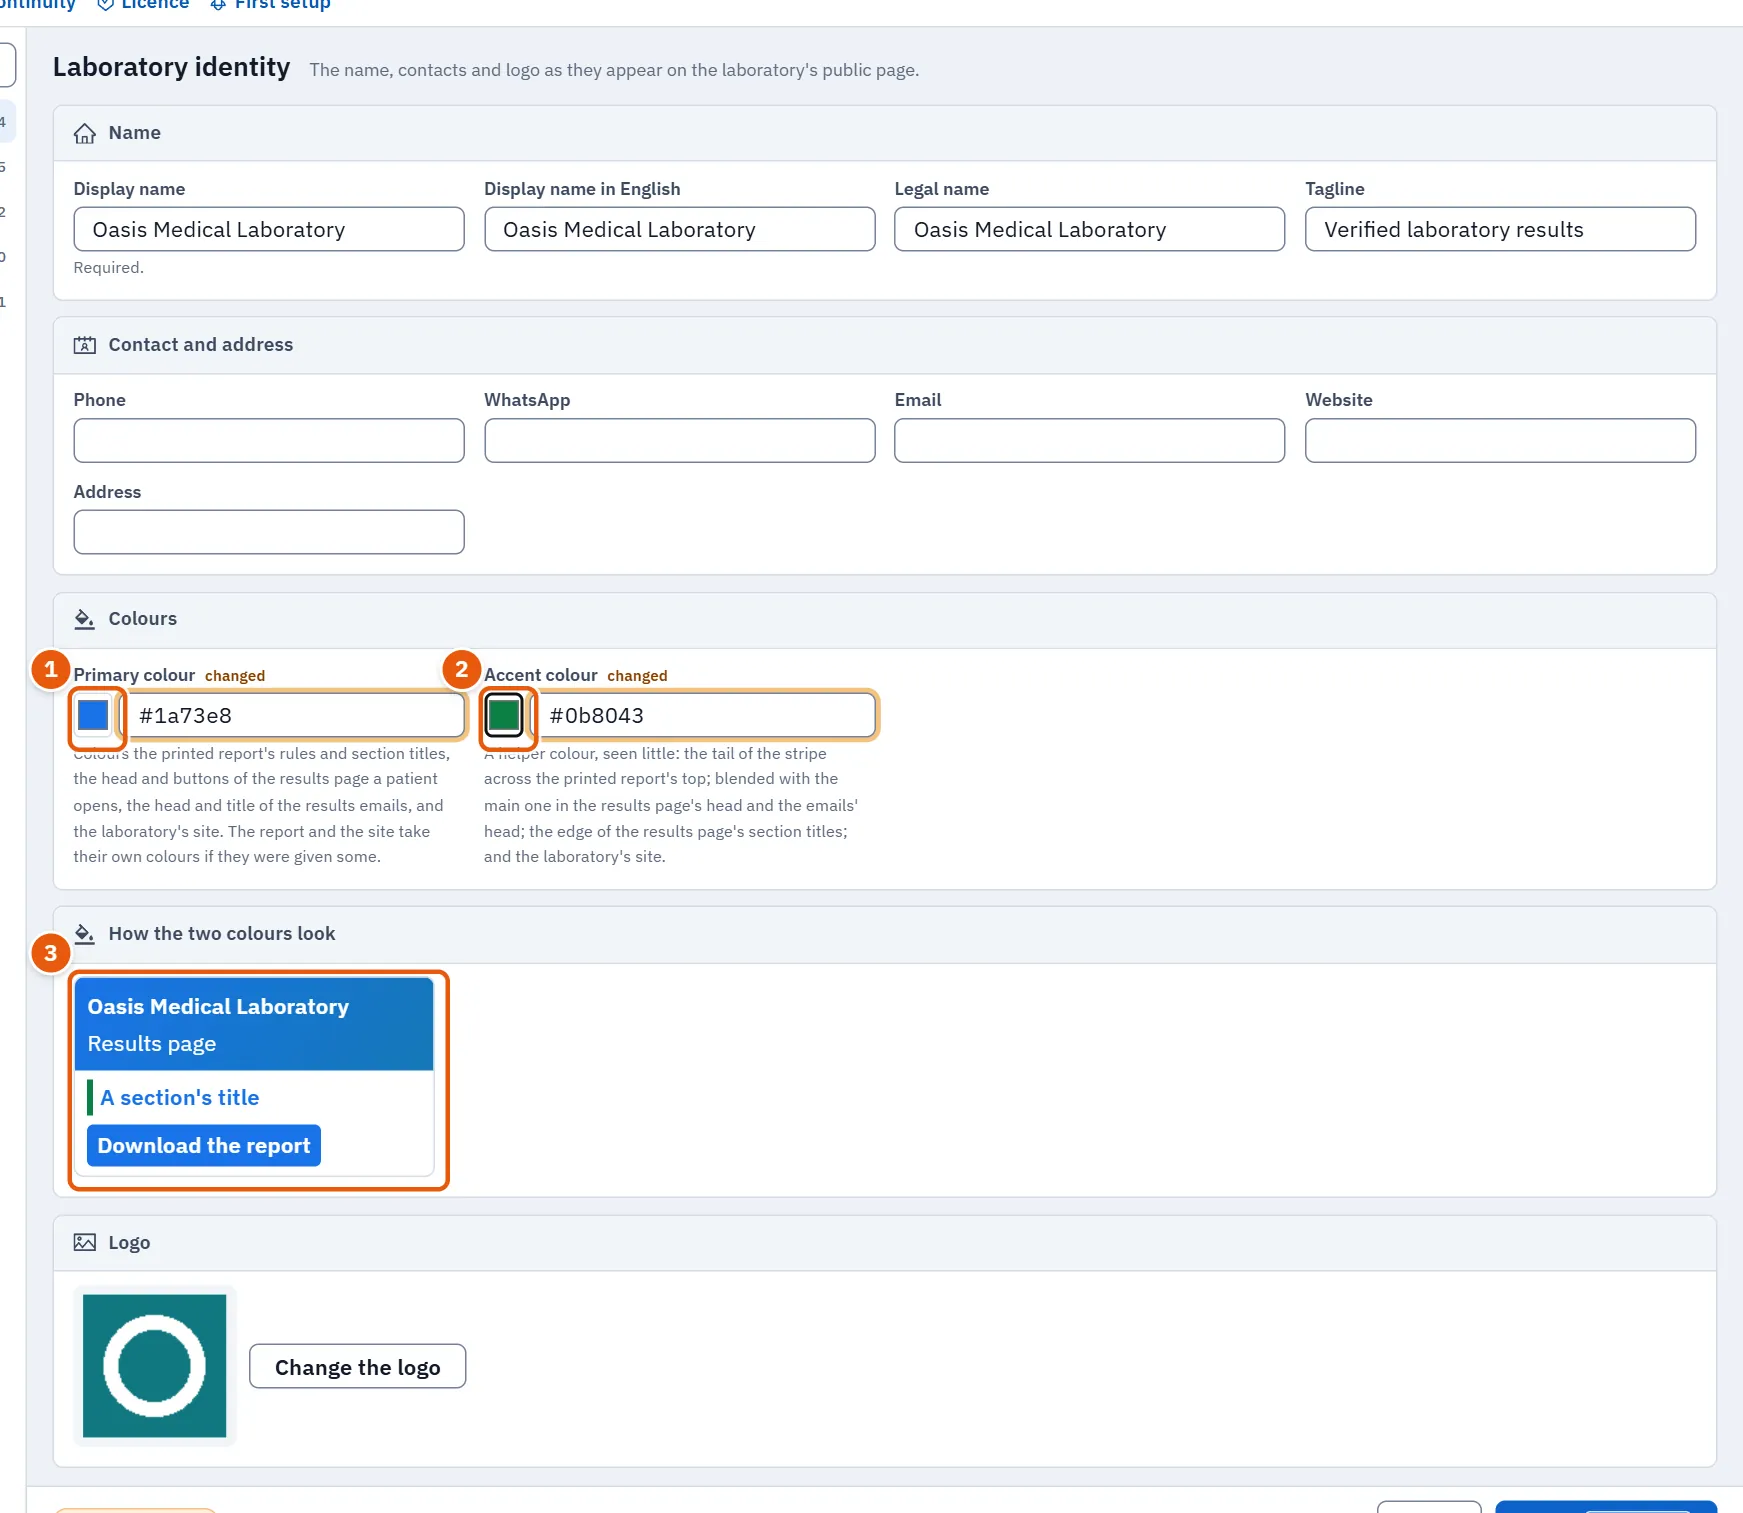
Each colour has a colour picker beside its code; the code box takes at most seven characters. A code is used only when it is whole (a # and six hexadecimal digits, for example #1a73e8); while it is half typed, the preview keeps the design's own colours.
25.4.4 How the two colours look
A small mock results page drawn from the two colours as you choose them: a head with the laboratory's name (Display name, or a stand-in if empty) and the words for the results page, a section title and a download button. It changes as you type, before you save.
25.4.5 Logo
Shows the current logo, or «No logo yet». Change the logo opens a file chooser for a PNG or SVG picture. The picture must not exceed 512 KB. A chosen picture counts as a change like any other and is saved with the rest. If you save without choosing a picture, the current logo stays.
25.5 Tasks step by step
25.5.1 Task 1 — Set the name and contacts
- Open Laboratory identity.
- In Name, type the Display name, and the English name, legal name and tagline if you want them.
- In Contact and address, fill in the numbers, email, website and address.
- Press Save.
25.5.2 Task 2 — Choose the colours
- In Colours, pick or type the Primary colour and the Accent colour.
- Look at How the two colours look and adjust until it reads well.
- Press Save.
25.5.3 Task 3 — Change the logo
- In Logo, press Change the logo.
- Choose a PNG or SVG file of at most 512 KB. The new picture appears at once.
- Press Save. Press Undo instead to give up all unsaved changes. Both buttons stay dimmed until something has changed.

25.6 Messages and what to do
| The screen says | What it means | What to do |
|---|---|---|
| The picture is larger than 512 KB once it is stored. Choose a smaller one. | The chosen picture is over 512 KB. | Choose a smaller picture. |
| Settings saved. | The identity was saved. | Nothing. |
| The settings could not be saved. Try again. | The save failed. | Try again. If the server gave a reason, it is shown under the save bar. |
| The settings could not be loaded. | The screen could not read the current identity. | Retry. |
25.7 See also
- General settings